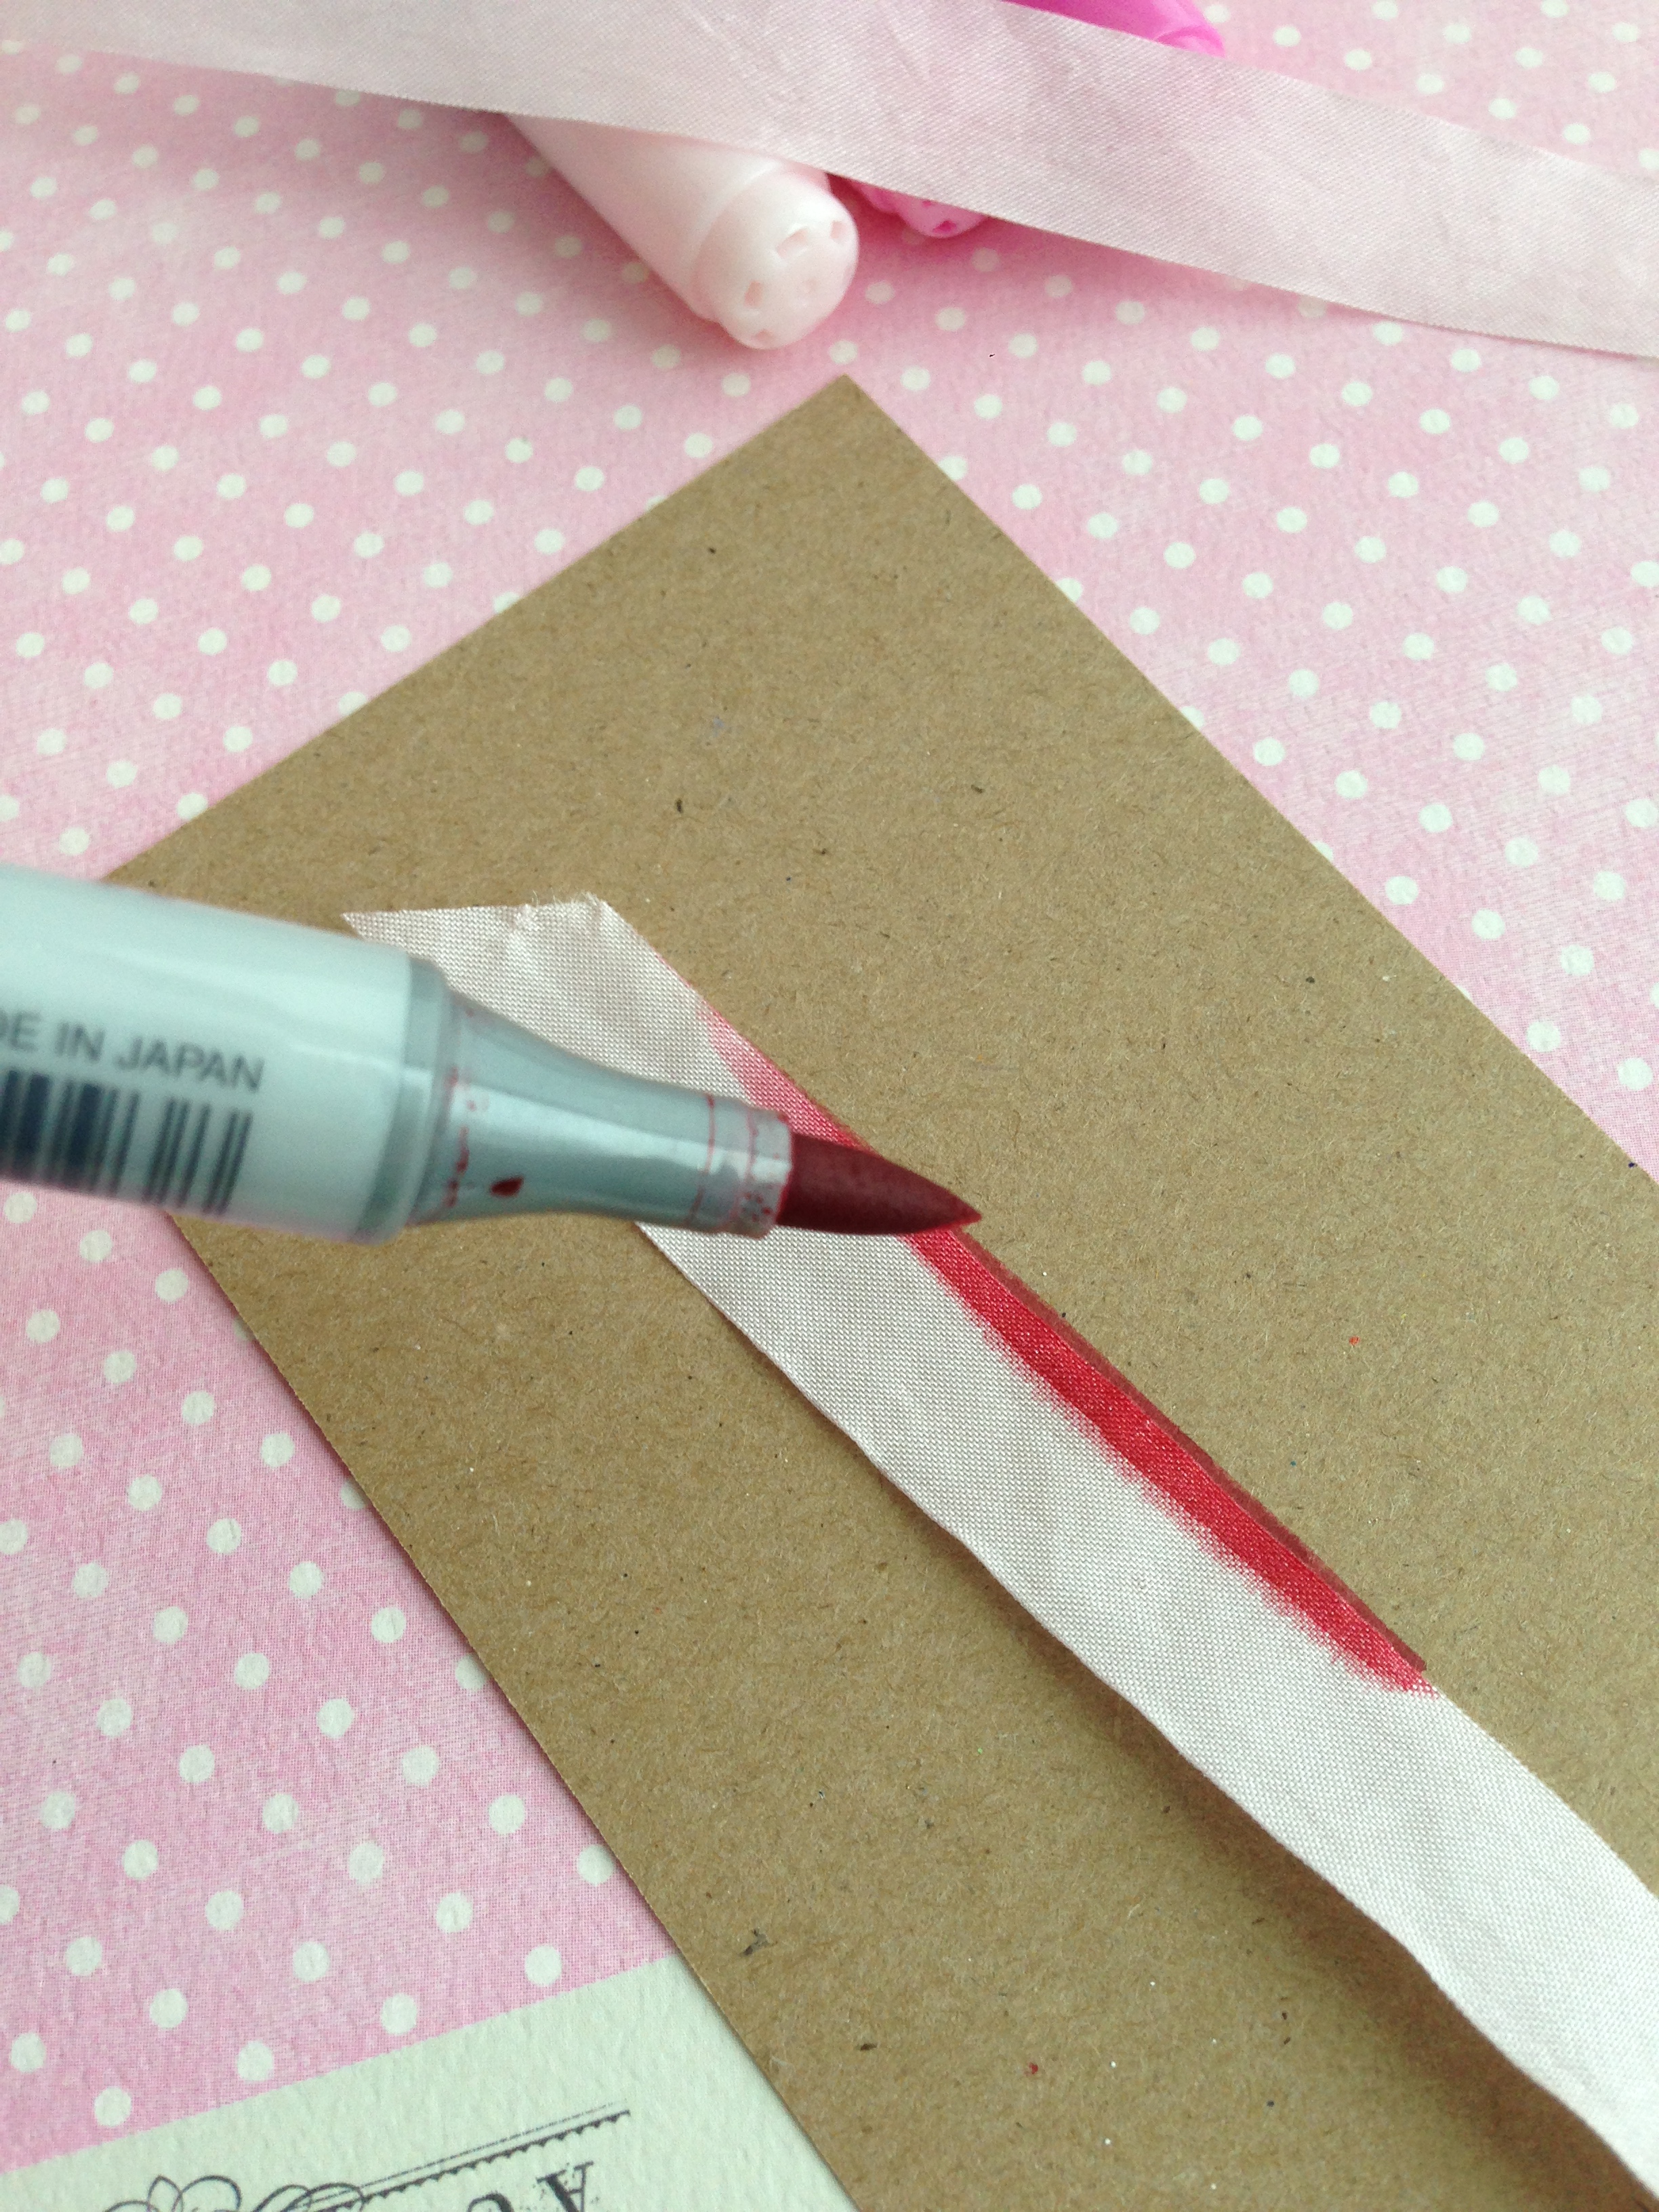
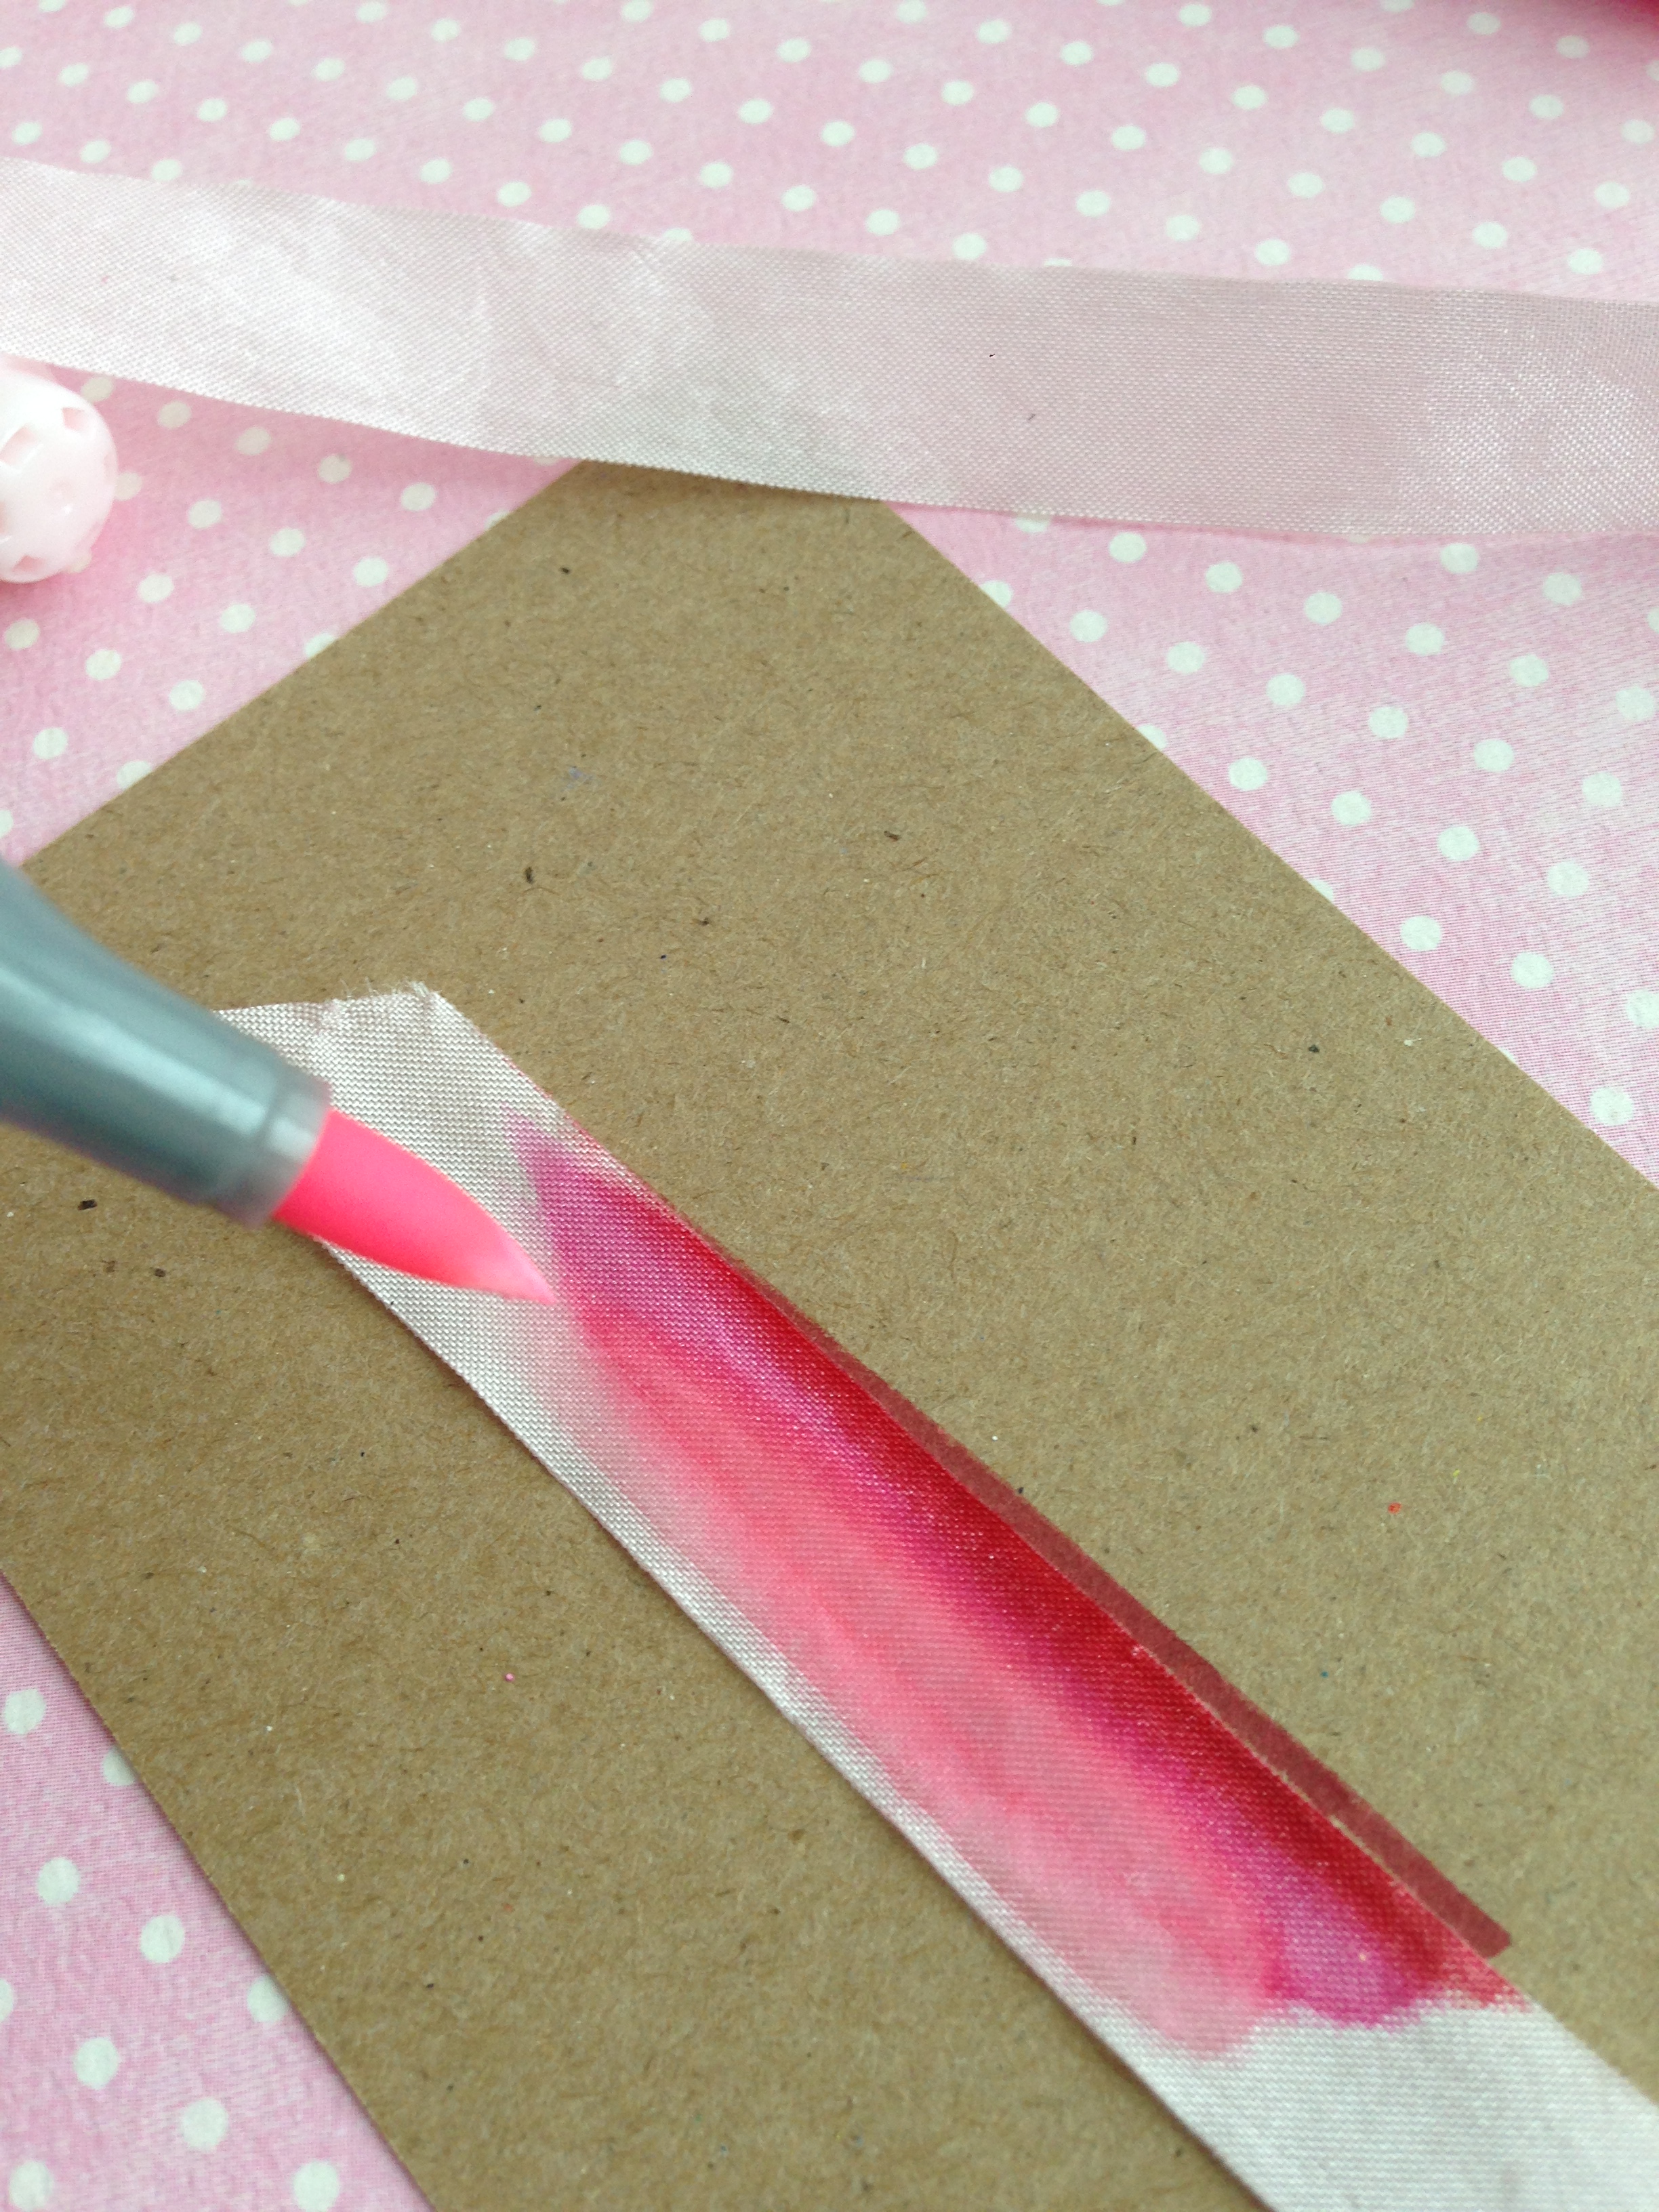
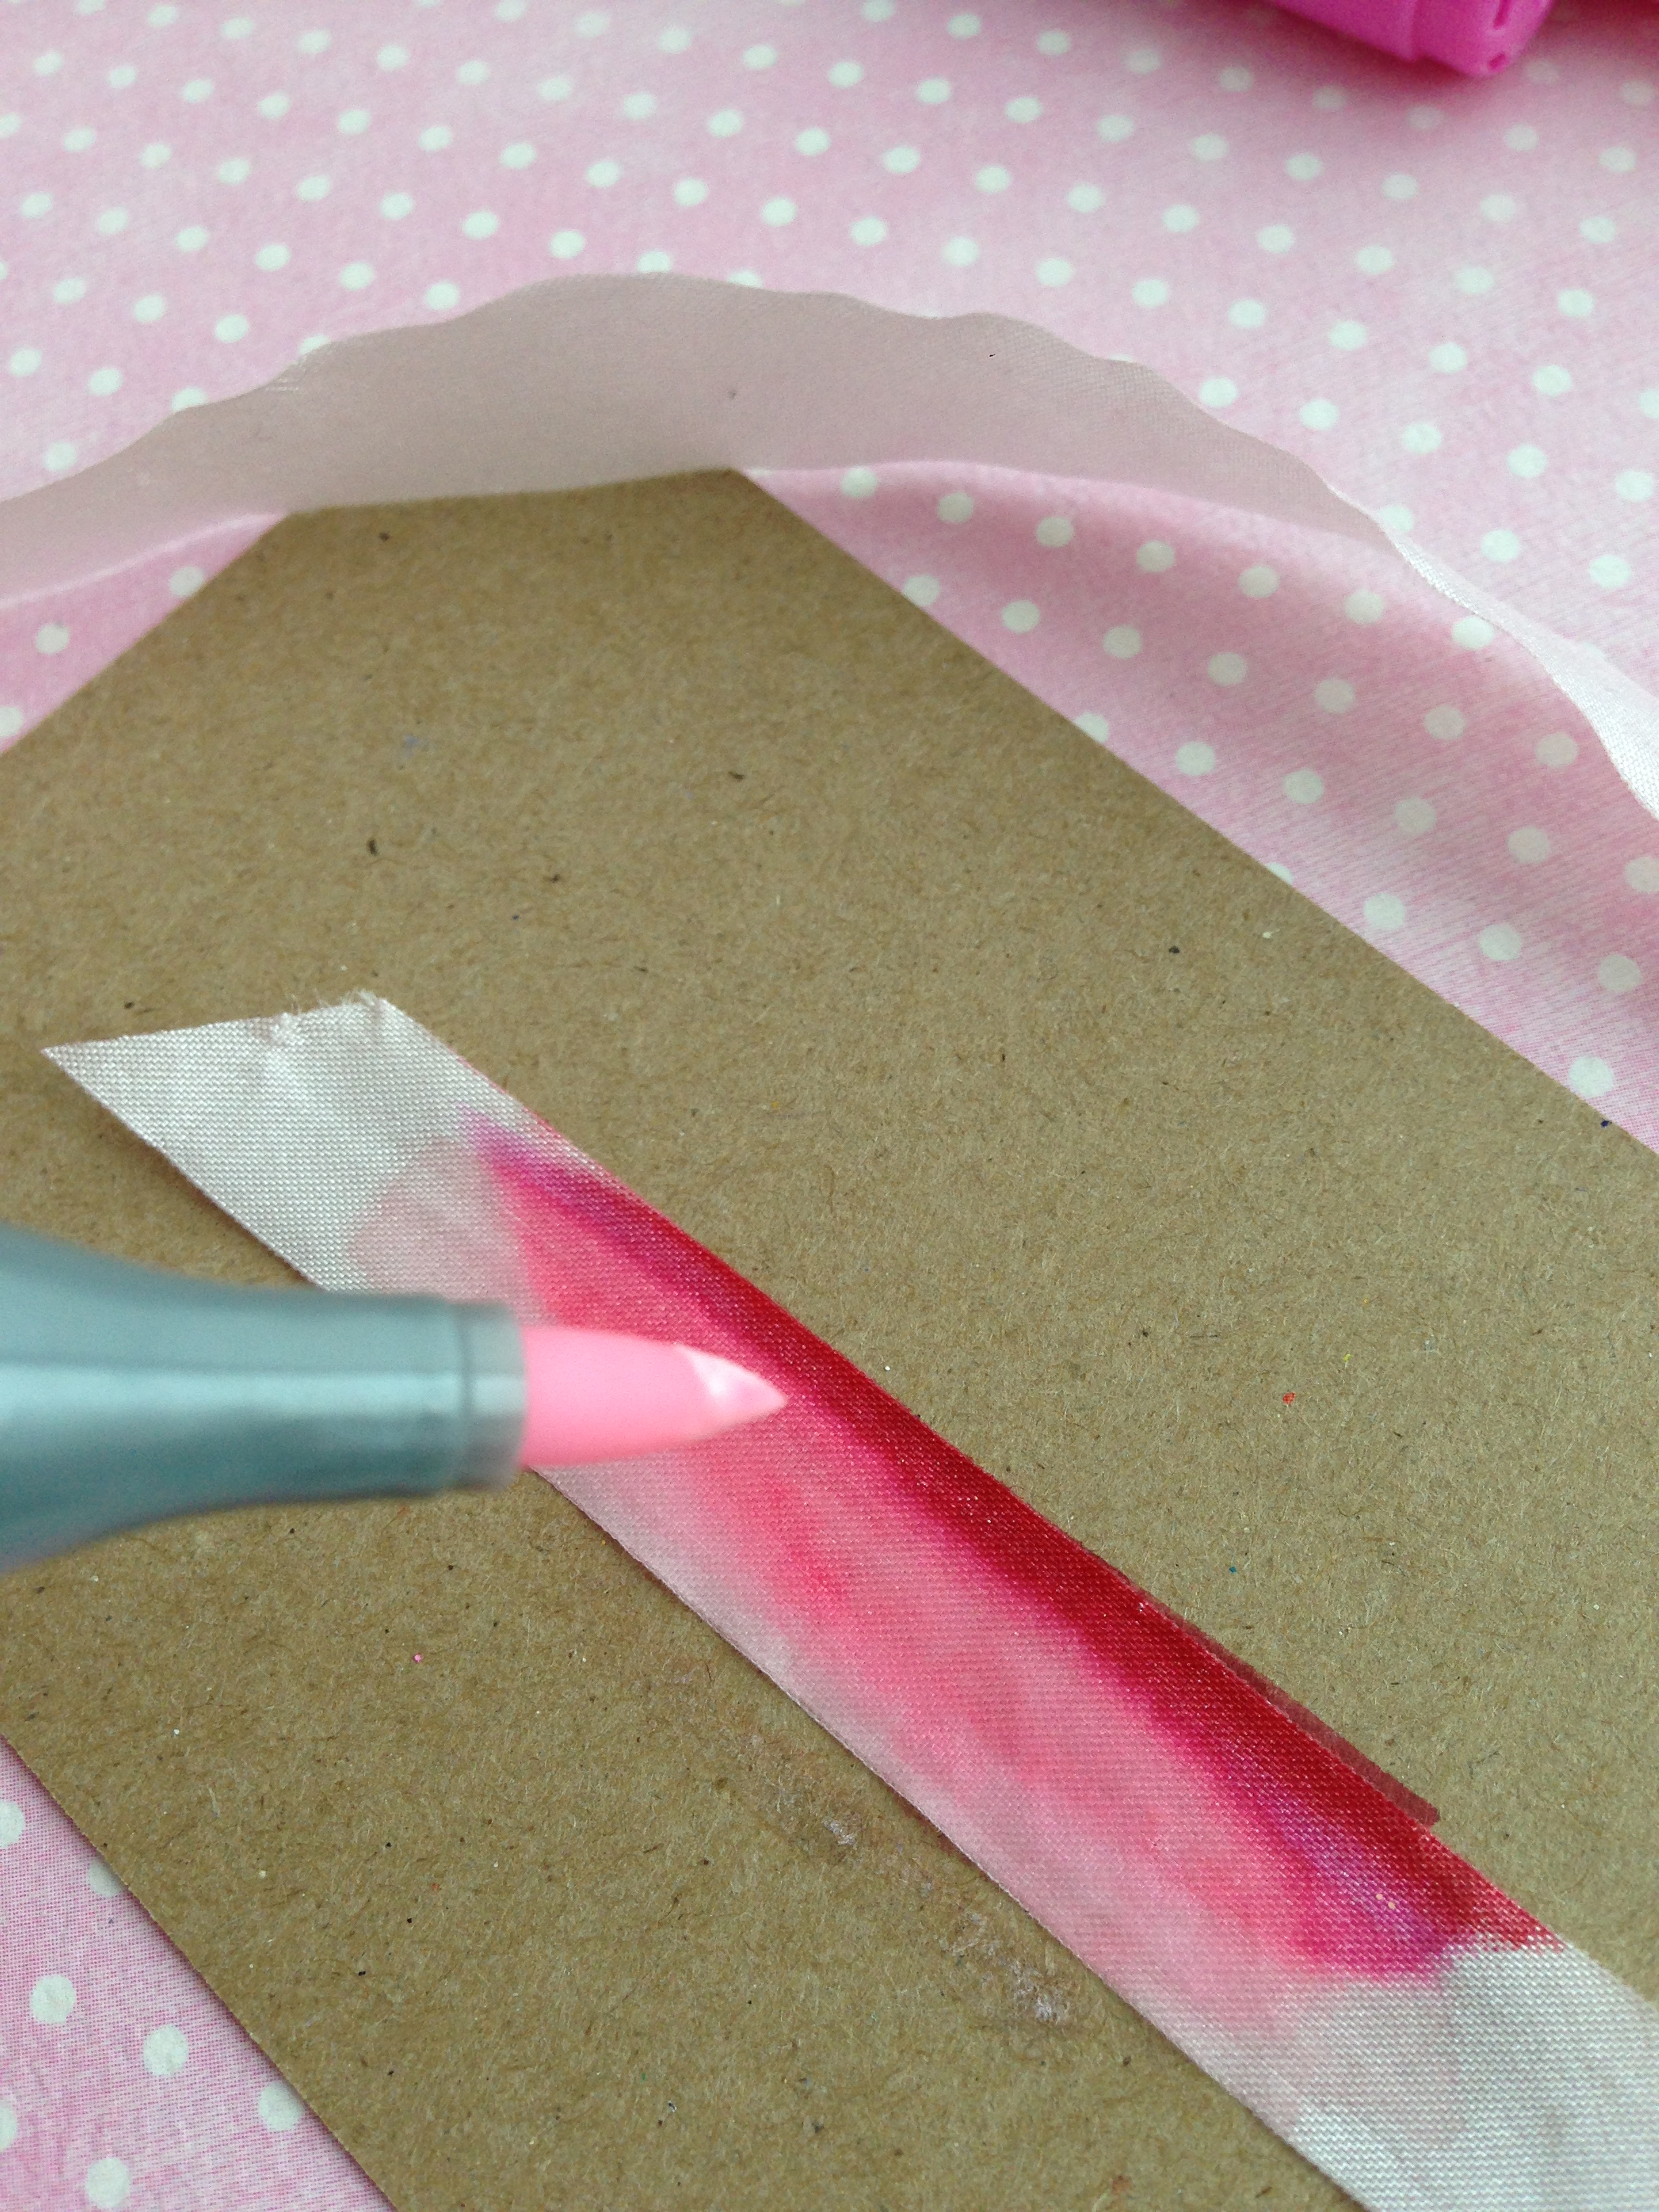
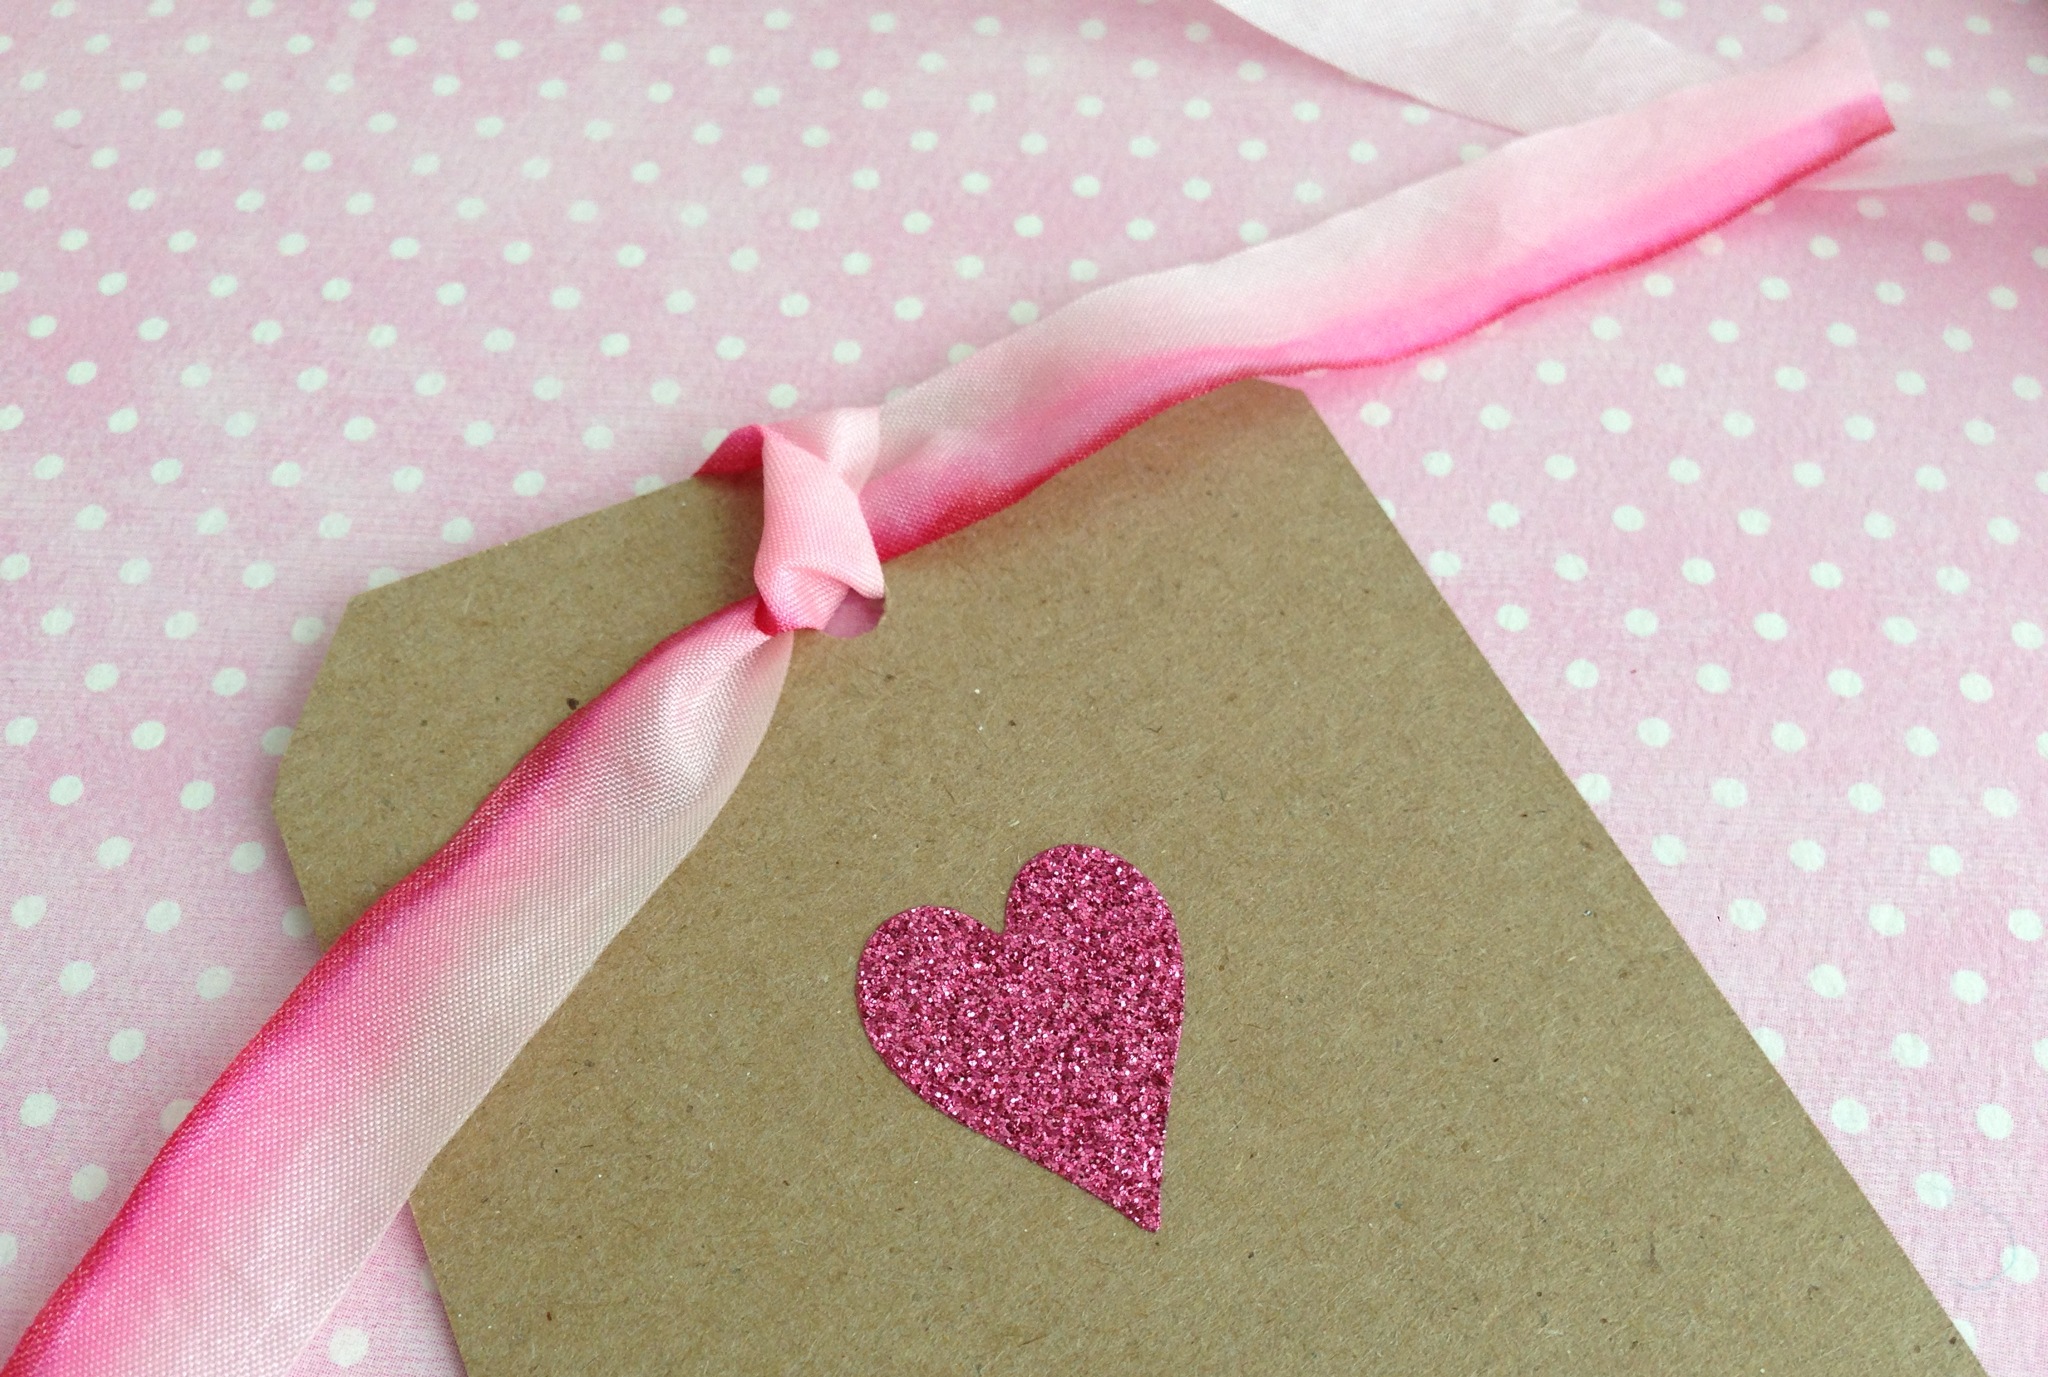
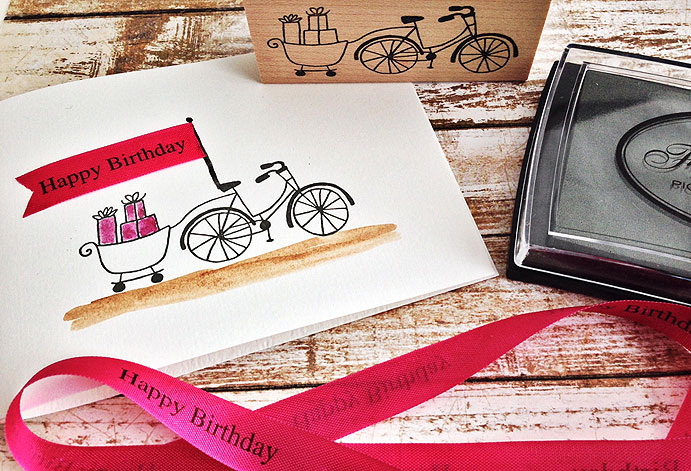
Add a fun flowing ribbon banner to the birthday bike stamp with this happy birthday rayon tiding ribbon. Stamp the bike and then use a black pen to draw a banner pole. Notch the ribbon end and glue a small piece to the pole. Ground the bike with a watercolor wash using your favorite watercolor set. We love our Koi set. The quality of this paint set is amazing. The set also comes with a waterbrush which we love to use too so it's a great bargain.
Trend Alerts
-
Watercolor Fun
We used our Seattle skyline die to make a creative stencil. Once the stencil was cut, the background was water colored on watercolor paper and then stamped over with the "hello from Seattle" stamp.
-
SALE this weekend
Summer is almost here! This summer card was made using Savvy's summer set dies and their wave stamp. The jar is a set from Avery Elle called "bottle it up". The cloud background was created using a cloud template. You can save 15% off your online order this weekend with coupon code "Memorial Day" Have a great weekend everyone.
-
Ikat Stamp
Do you love ikat? (I just found out that it's pronounced “ee-kaht”.) If you google Ikat images you'll see all kinds of beautiful examples. These patterns are popular in home furnishings, fashion and now stamps!
One of Impress' new images designed by Josephine Kimberling is an ikat border stamp. We've enjoyed stamping it with our FRESH ink colors - here we used basil.
Here we tried an ombre look by using two colors of FRESH ink.. We're loving the stamp. Thanks Josephine for a great design.
-
Make Your Own Ombre Ribbon!
Ombre is everywhere! Here's a collection of valentine cards for inspiration, each with an unique way of creating the ombre look.
We even colored our own ribbon! Copic Markers are perfect for coloring on the ribbon because they bleed and blend so well. I used colors: RV000, RV02, RV, 04, and R37.
First, run the pen along the seam with the darkest shade. The pen ink will slightly bleed.
Then, keep adding colors and slightly blend the two together. The ribbon will help do this on its own.
This is a fun way to dress up a simple kraft tag or the added touch to any card! -
Sweet Holiday Wishes
Here's a simple little treat or party favor you can make for friends and family around the holidays. Die cut a square envelope using Savvy's die. Make a hole using a 1/8" hole punch in the center of the fold on one of the flaps. Insert a flat sucker. Fold the flaps so they overlap and then add a touch of ribbon or baker's string. Attach a little banner and hand stamp with "sweet holiday wishes" .
-
Wishing you all the joys . . .
I saw this pretty post on Savvy's facebook page - I love the simplicity of this card and how it shows that just a few simple strokes of a couple of copic markers can bring a design to life and make a card special. Colors used on this card are G99 and G82. Notice how the vertical greeting becomes part of the design, not just a sentiment. The tree used is called the leaf tree.
-
Jar Art
Trend alert, canning jars are everywhere! Just do a search on Pinterest and you'll find hundreds of creative ways to use them. We have several canning jar stamps in our store and we're having fun filling them for each season. Here's an idea for a Halloween card. We filled the jar with a spider web and of course a scary spider. To make the jar look all the more real, add glossy accents over the stamped images to add a glass like shine. While the glossy accents is still wet, you can sprinkle a little Impress glitter over it to add some sparkle. Here's a close up. Eek!